預設組合
Presets are preconfigured settings used to quickly apply predefined configurations to POS orders, such as the fiscal position, pricelist, opening hours, order capacity limit, etc. They are particularly useful for businesses that need different configurations depending on the type of sale.
Example
Restaurants can use presets to adjust pricelists and capacities based on the order type, such as Dine In, Takeout, or Delivery.
Flower shops can use presets to apply different taxes when selling flowers and plants (taxed as goods) versus creating arrangements for funerals or weddings (taxed as services). Presets can also help streamline returns and apply different pricelists (with discounts) for loyal customers and/or members.
配置
備註
If a restaurant POS exists in the database, preconfigured presets are automatically available.
To enable and set presets for a POS, follow these steps:
导航至 销售点(POS)设置。
Under Point of Sale, enable Take out / Delivery / Members.
In the Available field:
Define a default preset in the Default field.
按一下 儲存。
If necessary, click Configure Presets, then select the desired preset and edit it, or click New to create a new one.
小訣竅
Once presets exist in the database, they can be accessed from .
Presets are automatically enabled when creating a new restaurant point of sale through the onboarding screen and selecting the Restaurant card.
On the relevant Presets form, apply or edit the following options:
Enter a preset Label.
If needed, add an image by clicking the (Edit) button when hovering over the camera image. This image is displayed in kiosk mode.
Pricelist: Select or configure a pricelist.
Fiscal Position: Select or configure a fiscal position. Fiscal positions are especially important in environments where customers must pay different tax rates depending on the type of order.
Manage orders by time: Enable this option to define time slots for scheduling orders. Then,
choose a working time in the Schedule based on field;
define the Preparation capacity to indicate how many orders can be handled in a given time frame;
configure the working hours in the Schedule tab.
Identification: Specify whether order identification details (such as a Name or an Address) are required.
Return mode: Select this mode only to process returns. All items added to the cart are entered as negative quantities.
Color: Define the preset button’s color in the register.
In the Self Ordering tab, enable Available in self to display presets in the self-order interface. Then, select a service zone in the Service at field and select or configure an email template in the Email Confirmation field.
In the Options tab, enable Guest to require users to enter the number of guests when taking an order.
小訣竅
On the preset form, click the Order(s) smart button to access the list of all orders created with the selected preset.
Apply presets to POS orders
Presets are available in both the POS register and the kiosk (provided the Available in self-order feature is enabled). The workflow varies based on the preset configuration.
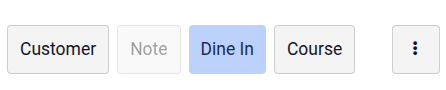
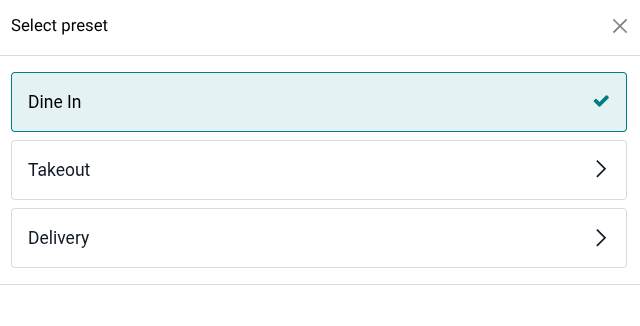
Presets are displayed in the POS register with the default preset selected. To change the preset, click the default preset button and select an available alternative. The default preset is automatically restored for the next order.
The features configured for presets trigger specific actions in the POS register:
If Identification is required for the selected preset, you must enter specific information (depending on the selected option) before proceeding to checkout:
Name: Select an order name or enter a new one (only for restaurant points of sale). To modify it, click the (Actions) menu and select Edit Order Name.
Address: Choose an existing customer or Create a new one, and make sure they have an address assigned. The customer’s name is displayed in the pad. Click it to select a different customer or edit the customer’s details if needed.
小訣竅
Use the search bar to find a customer.
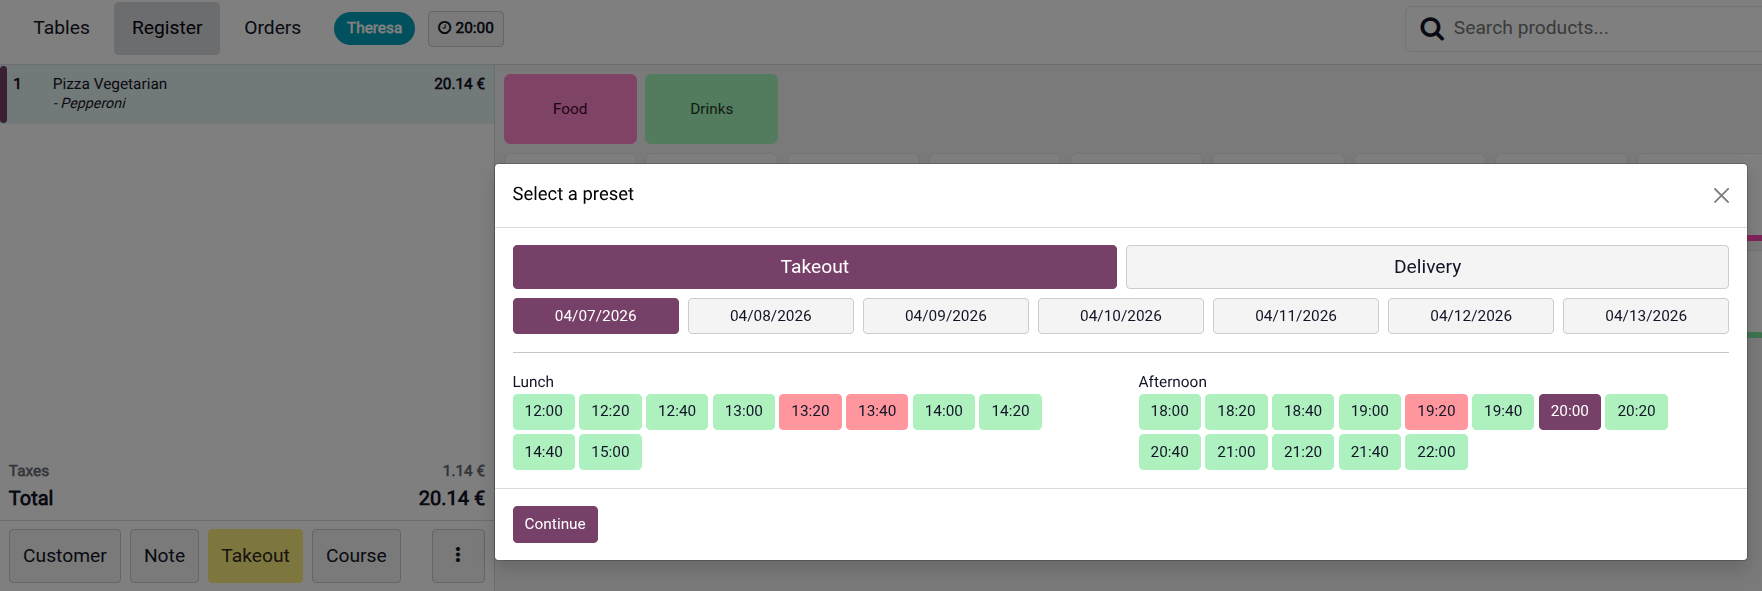
If the Manage orders by time option is enabled for the selected preset, select a date and time (displayed in green). The selected time is displayed in the header of the POS interface. Click it to modify the time.
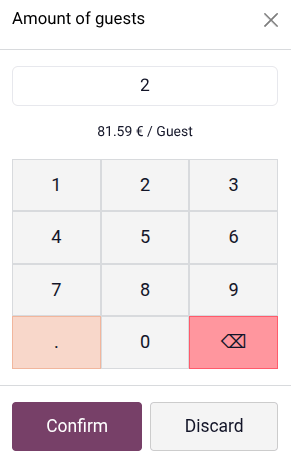
If the Guest feature is enabled for the selected preset, a pop-up appears prompting you to enter the number of guests, and the amount per guest is displayed (the total amount divided by the number of guests).
Presets can be used in the kiosk of the self-ordering mode. Once the customer taps the Order Now button, all available preset options, along with their respective images, are displayed.

The features configured for presets trigger specific actions in the kiosk:
Customers may need to enter specific information in the We need more info pop-up:
If Identification is required:
Name: Customers must enter their Name. The Phone field is optional.
Address: Customers must enter their Name, Phone number, and address details.
If the Manage orders by time option is enabled: Customers must select a time on a specific date from the dropdown menu.
If the Email confirmation field is set: Customers must enter their Email to proceed.
If Table is selected in the Service at field for Self ordering mode, customers must enter their tracker number at the end of the ordering process.