处理维修订单
有时,交付给客户的产品会在运输过程中破损或损坏,需要退货退款、交付替代产品或进行维修。
In Odoo, repairs for products returned by customers can be tracked in the Repairs app. Once repaired, products can be redelivered to the customer.
损坏产品的退货和维修流程通常遵循以下步骤:
退货订单
Returns can be processed in Odoo via reverse transfers, created directly from a sales order (SO) once products have been delivered to a customer.
To create a return, navigate to the , and click into an SO from which a product should be returned. Then, from the SO form, click the Delivery smart button. Doing so opens the delivery order (DO) form.
From this form, click Return. This opens a Reverse Transfer pop-up window.
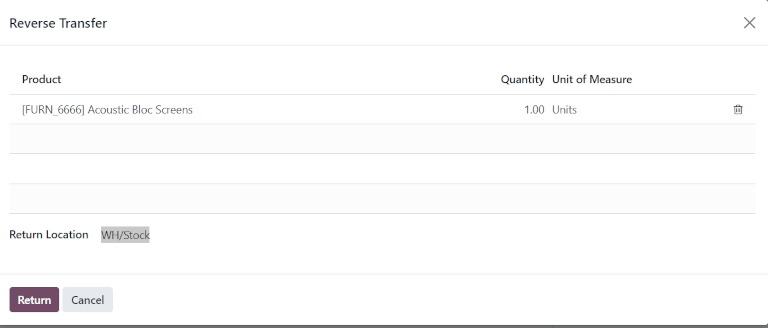
This pop-up lists the Product included in the order, the Quantity delivered to the customer, and the Unit of Measure the product was in.
Click the value in the Quantity field to change the quantity of the product to be returned, if necessary.
Click the 🗑️ (trash) icon at the far-right of the product line to remove it from the return, if necessary.
Once ready, click Return to confirm the return. This creates a new receipt for the returned products.
Once the product has been returned to the warehouse, receipt of the return can be registered in the database by clicking Validate from the reverse transfer form.
小訣竅
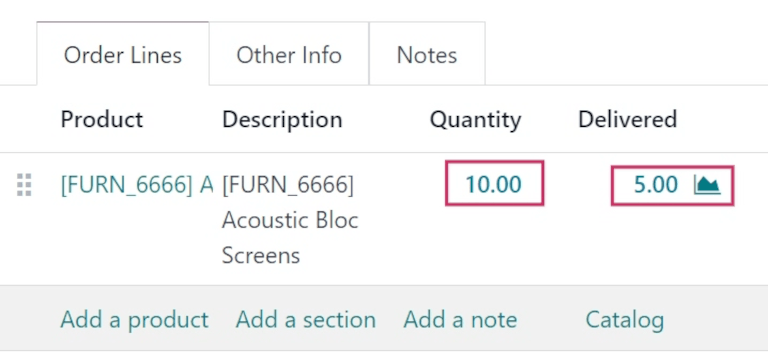
Once a reverse transfer for a return is validated, the value in the Delivered column on the original SO updates to reflect the difference between the original Quantity ordered, and the Quantity returned by the customer.
Create repair order
Once products have been returned, their repairs can be tracked by creating a repair order (RO).
Repair form configuration
To create a new RO, navigate to , and click New. This opens a blank RO form.
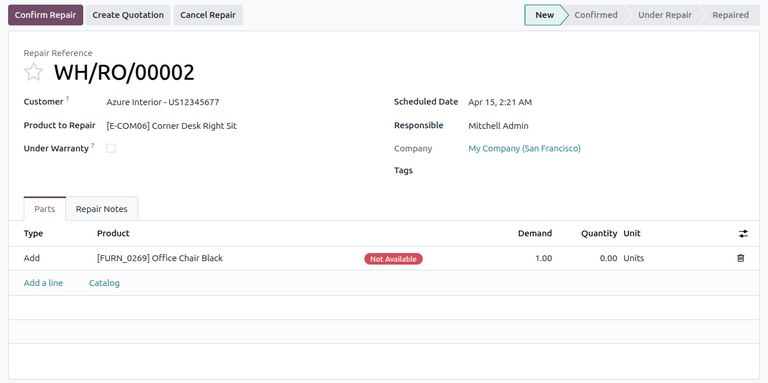
On this form, begin by selecting a Customer to whom the order should be invoiced and delivered.
In the Product to Repair field, click the drop-down menu to select the product that needs repair. If the product chosen is tracked by lot or serial number, an additional Lot/Serial field appears for the user to specify the lot or serial number of the repair product.
Next, tick the Under Warranty checkbox, if the product being repaired is covered by a warranty. If ticked, the Customer is not charged for all the parts used in the repair order.
After specifying details about the customer’s repair, fill in the following fields:
Scheduled Date: Specific date to start the repair.
Responsible: Specific user in the database responsible for the repair.
Company: Specific company this RO belongs to, if in a multi-company environment. This field is automatically populated and non-modifiable.
Tags: Relevant tags to apply to this RO.
Parts tab
The Parts tab allows users to specify parts to add, remove, or recycle during the repair. To specify a part, click Add a line.
In the Type column, click the box to reveal three options to choose from:
Add: Add this component for use during the repair.
Remove: Remove this component from the product being repaired.
Recycle: Recycle this component during the repair, saving it for later use in the warehouse.
Next, configure information about the part in the remaining columns:
Product: Select which part should be added, removed, or recycled.
Demand: Specify the quantity of this part to be used in the repair, if necessary.
Quantity: Automatically updated with the number of parts actually used. This field can be manually changed, if needed.
Unit: Select the UoM for the part.
小訣竅
To add additional columns to the line, click the (optional columns drop-down) icon in the header row. Select the desired options to add to the line.
Repair Notes tab
Click the Repair Notes tab to add internal notes about this specific RO (e.g., anything the user performing the repair might need to know).
Initiate repair
Once all desired configurations have been made on the RO form, click Confirm Repair. This moves the RO to the Confirmed stage and reserves the necessary components needed for the repair. A Component Status also appears on the RO form, indicating whether the repair order is Available or Not Available based on the availability of the parts.
Once ready, click Start Repair. This moves the RO to the Under Repair stage. If the RO should be cancelled instead, click Cancel Repair.
一旦成功修复所有产品,RO 即告完成。要在数据库中登记,请点击 结束修复。
備註
If all parts added to the RO were not used, clicking End Repair causes a Confirmation pop-up window to appear. The pop-up window informs the user that there is a difference between the initial demand and the actual quantity used for the repair order.
To validate, click Ok. Otherwise, click Cancel.
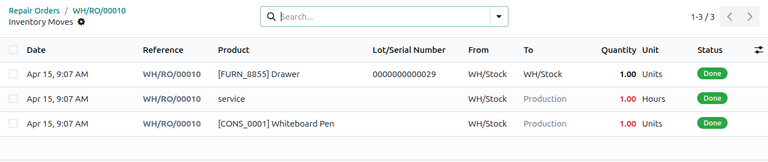
Ending the repair moves the RO to the Repaired stage. A Product Moves smart button also appears above the form.
Click the Product Moves smart button to view the product’s moves history during and after the repair process.
Return product to customer
If the product is under warranty, it can be returned to the customer after the repair.
However, if the product is not under warranty, click Create Quotation. This opens a new SO form, pre-populated with the parts used in the RO, with the total cost of the repair calculated.
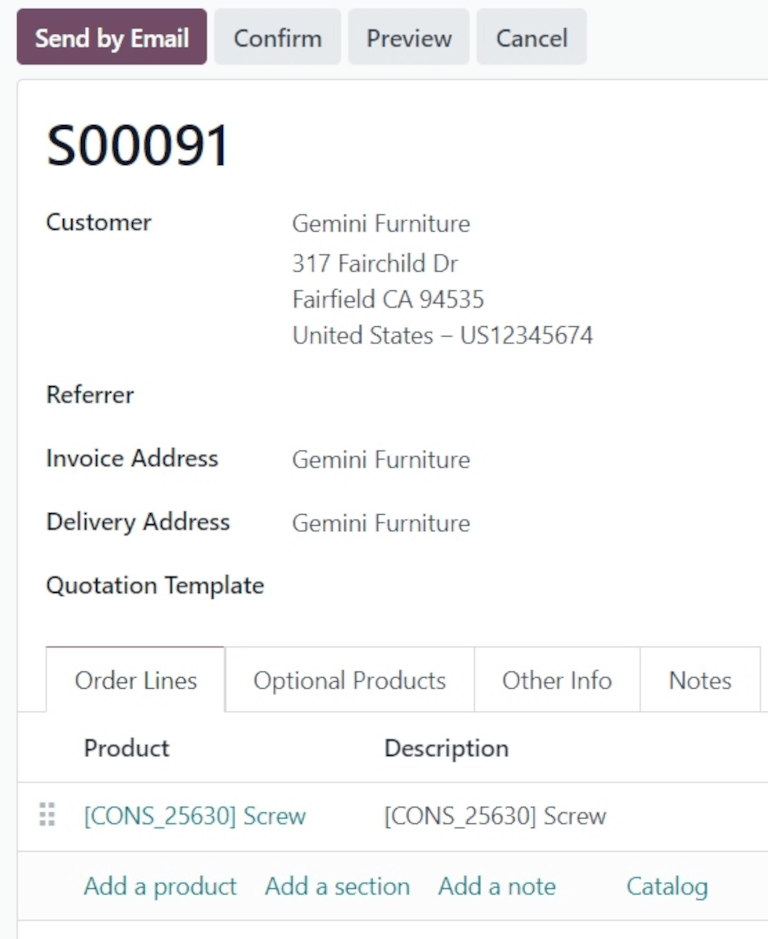
如果应将此 SO 发送给客户,请点击 确认,然后继续向客户开具维修发票。
小訣竅
如果应向客户收取维修服务费用,则可创建服务类型产品,并将其添加到已维修产品的 SO 中。
要将产品退还给客户,请导航至 并选择最初处理退货的原始 SO。然后点击 送货 智能按钮。
在生成的操作列表中,点击 “反向传送”,由 源文件 指示,其内容应为 返回 WH/OUT/XXXXX。
这将打开退货表单。在表格顶部,会出现一个 维修订单 智能按钮,将此退货与已完成的 RO 链接起来。
点击表格顶部的 返回。这将打开一个 逆向转移 弹出窗口。
This pop-up lists the Product included in the order, the Quantity delivered to the customer, and the Unit of Measure the product was in.
Click the value in the Quantity field to change the quantity of the product to be returned, if necessary.
Click the 🗑️ (trash) icon at the far-right of the product line to remove it from the return, if necessary.
准备就绪后,点击 退回 确认退货。这将为退回的产品创建一个新的交货。
处理完交货并将产品退还给客户后,点击 验证 验证交货。
其他資料