Self-signed certificate for ePOS printers
Important
Since the Chromium 142 update, using a self-signed certificate is no longer required. The recommended approach is to use the Local Network Access method instead.
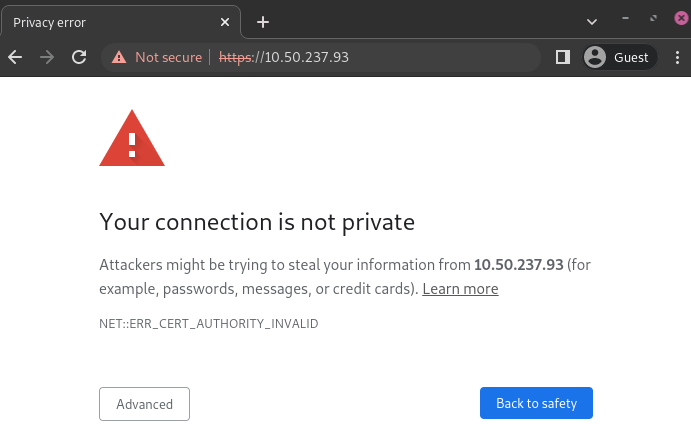
To work with Odoo, some printer models that can be used without an IoT system may require the HTTPS protocol to establish a secure connection between the browser and the printer. However, trying to reach the printer’s IP address using HTTPS results in a warning page in most web browsers. Force the connection to establish an HTTPS link and enable the printer in Odoo.
Generation, export, and import of self-signed certificates
Printers that operate without an IoT system still require secure communication, which can be achieved by generating, exporting, and/or importing a self-signed certificate.
Important
Generating a self-signed certificate should only be done once. Creating another certificate causes devices using the previous one to lose HTTPS access.
Printers that use an IoT system do not need a self-signed certificate, as the IoT box generates it automatically.
For stable results, it is strongly recommended to use the Google Chrome browser to generate the self-signed certificate.
Note
To export self-signed certificates from an operating system or a web browser that is not
mentioned in this documentation, search for export SSL certificate and the name of your
browser or operating system in the preferred search engine. Similarly, to import self-signed
certificates, search for import SSL certificate root authority in the preferred search engine.
Self-signed certificate generation
The generation process depends on the OS and the browser.
To generate a self-signed certificate on Google Chrome, follow the next steps:
Open the browser, type the printer’s IP address in the search bar (e.g.,
https://192.168.1.25), and pressEnter.On the security warning page, click Advanced, then Proceed to [IP address] (unsafe) to force the connection.
On the EPSON platform, click Advanced Settings, then Administrator Login to log in to the printer’s homepage.
Type the initial password located at the back of the printer in the Current Password field, then press
Enter.Go to .
On the Certificate page, click Update under the Self-signed Certificate section.
Adapt the Common Name field to retain only the IP address, then click Next, then OK. Wait for the printer’s lights to stop blinking.
Note
The Epson homepage may vary depending on the printer model used. For the Epson TM-m30 ii,
log in to the Epson homepage by typing epson as the username and the printer’s serial
number as the password.
To generate a self-signed certificate using the Keychain Access app on Mac, follow the next steps:
Access the Keychain Access app on Mac.
Go to .
Enter a name for the certificate.
Select an identity type, then the type of certificate.
Click Create.
Review the certificate, then click Done.
Self-signed certificate export
The export process depends on the OS and the browser.
To export the certificate, follow the next steps:
Once the printer’s lights are solid, hover the mouse over the browser’s search bar and click Not secure, then Certificate details.
Click the Details tab in the Certificate Viewer popover, then click Export.
Add
.crtnext to the IP address in the File name field.Set the Save as type field to
Base64-encoded ASCII, single certificate.Click Save.
To export the certificate, follow the next steps:
Click Not secure next to the search bar.
Go to .
Click View certificate in the Security tab, then Details.
Select the certificate, click Export, then select a folder in your local drive.
Click Close.
To export the certificate, follow the next steps:
Open the browser, type the printer’s IP address in the search bar (e.g.,
https://192.168.1.25), and pressEnter.On the security warning page, click Advanced, then Proceed to [IP address] (unsafe) to force the connection.
Click Not secure next to the search bar, then Certificate is not valid.
Go to the Details tab and click Export.
Add
.crtat the end of the file name to ensure it has the correct extension.Select
Base64-encoded ASCII, single certificate, at the bottom of the popover.Click Save.
To export the certificate, follow the next steps:
Open the browser, type the printer’s IP address in the search bar (e.g.,
https://192.168.1.25), and pressEnter.Click Not secure next to the search bar.
Go to .
Click View certificate in the Security tab, then Details.
Select the certificate, click Export, then select a folder in your local drive.
Click Close.
Self-signed certificate import
The import process depends on the OS and the browser.
To import a self-signed certificate from Google Chrome:
Open the browser.
Go to , and click Manage certificates.
Click Manage imported certificates from Windows on the Certificate Manager page.
Click Import in the Certificates popover.
In the Certificate Import Wizard, click Next, then Browse to select the certificate, and click Next again.
Select the Place all certificates in the following store option.
Click Browse, select the Trusted Root Certification Authorities folder, and click OK.
Click Next, then Finish.
Click Yes in the Security Warning popover.
Note
To import a self-signed certificate using Mozilla Firefox on Windows, see the steps in the Linux tab.
To import a self-signed certificate, follow the next steps:
Open the browser.
Go to , and click Manage certificates.
Click Installed by you under the Custom section on the Local certificates tab.
Click Import next to Trusted Certificates, and select the exported certification file from your local drive.
Accept all warnings.
Click ok.
To import a self-signed certificate, follow the next steps:
Open the browser.
Go to .
In the Certificate Manager popover, click the Your Certificates tab, then Import, and select the certificate in your local drive.
Click the Servers tab in the Certificate Manager popover.
Click Add Exception.
Enter the printer’s IP address in the Location field, then click Get Certificate.
Enable the Permanently store this exception option and confirm.
Important
The specific steps for installing a certificate may vary depending on the Android version and the device manufacturer.
To import a self-signed certificate into an Android device, first create and export it from a
computer. Then, transfer the .crt file to the device via email, Bluetooth, or USB. Once
the file is on the device, install the EPSON ePOS SDK for JavaScript if required, then follow
the next steps:
Go to the device settings.
Type
certificatein the search bar.Click Certificate AC, then Install from device storage.
Select the certificate file to install it on the device.
Note
Download the certificate on a computer if the tablet restricts direct downloads. Forward the file via email, then open it directly from the tablet to complete the installation.
To import a self-signed certificate into an iOS device, first create and export it from a
computer. Then, transfer the .crt file to the device via email, Bluetooth, or any
file-sharing service.
Downloading this file triggers a warning popover. Click Allow to download the configuration profile, and close the second popover. Then follow the next steps:
Go to the Settings app on the iOS device.
Click Profile Downloaded under the user’s details box.
Locate the downloaded
.crtfile and select it.Click Install in the top-right corner.
Enter a passcode if needed.
Click Install in the top-right corner of the certificate warning screen and the popover.
Click Done.
Once the certificate is installed, authenticate it as follows:
Go to .
Enable the installed certificate using the (switch) toggle.
Click Continue in the popover.
Certificate import verification
To confirm the printer’s connection is secure, connect to its IP address using HTTPS. For example,
navigate to https://192.168.1.25 in a browser. If the self-signed certificate has been applied
correctly, no warning page appears, and the address bar should display a padlock icon, indicating a
secure connection.