Vidarefakturera kostnader
If expenses are tracked on customer projects, they can be automatically charged back to the customer. This is done by creating an expense, referencing the sales order to which it is added, then creating an expense report.
Därefter godkänner cheferna utläggsrapporten <expenses/reinvoice-approve>, innan ekonomiavdelningen bokför verifikaten <expenses/reinvoice-approve>.
Finally, once the expense report is posted to a journal, the expenses appear on the specified SO. The SO is then invoiced, thus charging the customer for the expenses.
Viktigt
The Sales and Accounting apps must be installed for this configuration.
Approving expenses, posting expenses to accounting, and re-invoicing expenses on SOs are only possible for users with the appropriate access rights.
Se även
This document provides lower-level instructions to create, submit, approve, and post expenses. For fully-detailed instructions for any of these steps, refer to the following documentation:
Inställning
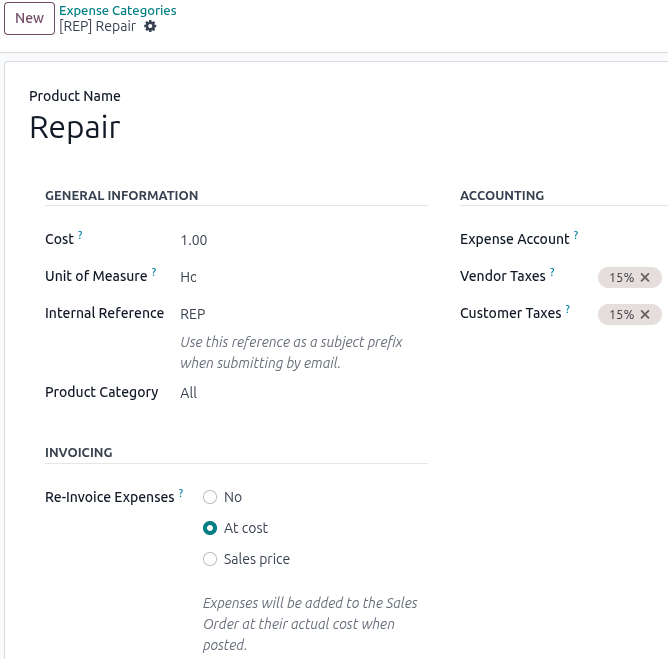
In the Expense app, specify the invoicing policy for each expense category. Navigate to . Click on the desired expense category or create a new one.
Under the Invoicing section, click the radio button next to the desired selection for Re-Invoice Costs:
No: The expense category cannot be re-invoiced.
At cost: The expense category invoices expenses at the Cost set on the expense category form.
Sales price: The expense category invoices at the Sales Price set on the expense form.
The default expense categories have the following re-invoicing policies:
At cost |
Sales price |
Not enabled |
|---|---|---|
COMM: Communication expenses such as phone bills, postage, etc. |
FOOD: Meal expenses such as restaurants, business lunches, etc |
EXP_GEN: Others. |
TRANS & ACCT: Travel and accommodation expenses such as hotel, plane ticket, taxi, etc. |
MIL: Mileage. |
GIFT: Gifts to customers or vendors. |
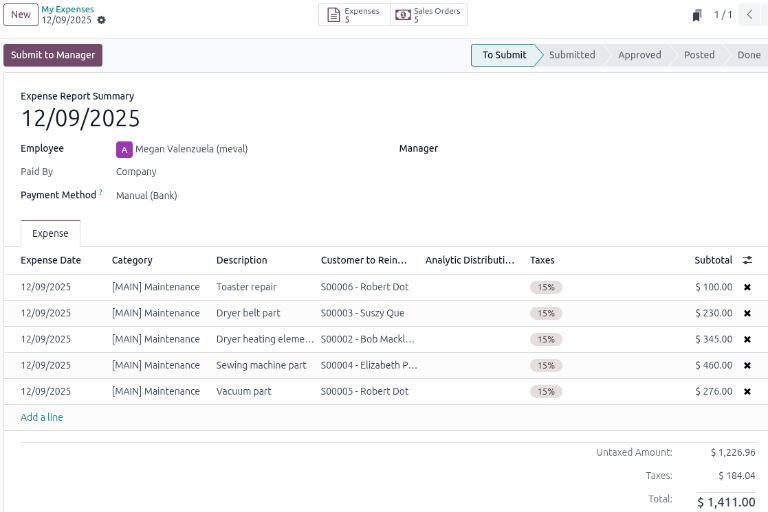
Skapa ett utlägg
To re-invoice an expense, first create an expense record. In the Customer to Reinvoice field, use the drop-down menu to select the SO to add the expense to.
Viktigt
Att välja rätt SO i fältet Customer to Reinvoice är kritiskt, eftersom det är så utlägg faktureras automatiskt efter att en utläggsrapport har godkänts.
Analytic Distribution
Viktigt
For the Analytic Distribution field to be visible the Accounting app must be installed, Analytic Accounting, and Analytic Plans must be configured. Refer to Objektredovisning for more information.
As an optional step, select the Analytic Distribution the expense is posted to. Multiple accounts can be selected, if desired.
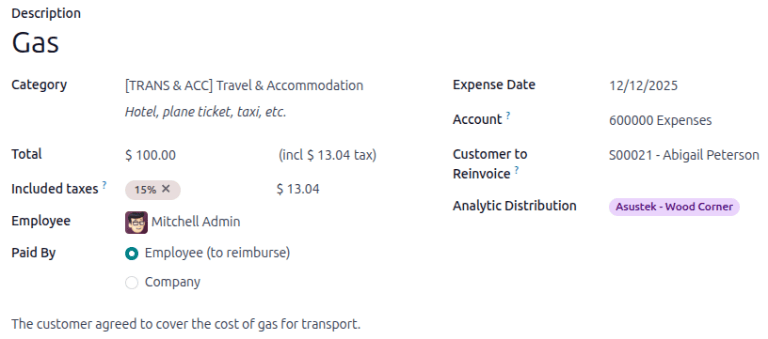
To add another Analytic Distribution, click on the line to reveal the Analytic pop-over window. Click Add a line, then select the desired Analytic Distribution from the drop-down field.
If selecting more than one Analytic Distribution, the Percentage fields
must be modified. By default, both fields are populated with 100%. Adjust the percentages for
all the fields, so the total of all selected accounts equals 100%.
Example
Ett måleriföretag åtar sig att måla en kontorsbyggnad som inrymmer två olika företag. Under kostnadsberäkningen hålls ett möte på kontoret för att diskutera projektet.
Båda företagen är överens om att betala för resekostnaderna för de anställda på måleriföretaget. När du skapar utgifterna för milersättning och hotell listas båda företagen på raden Objekt fördelning, för 50% vardera.
Skapa en utgiftsrapport
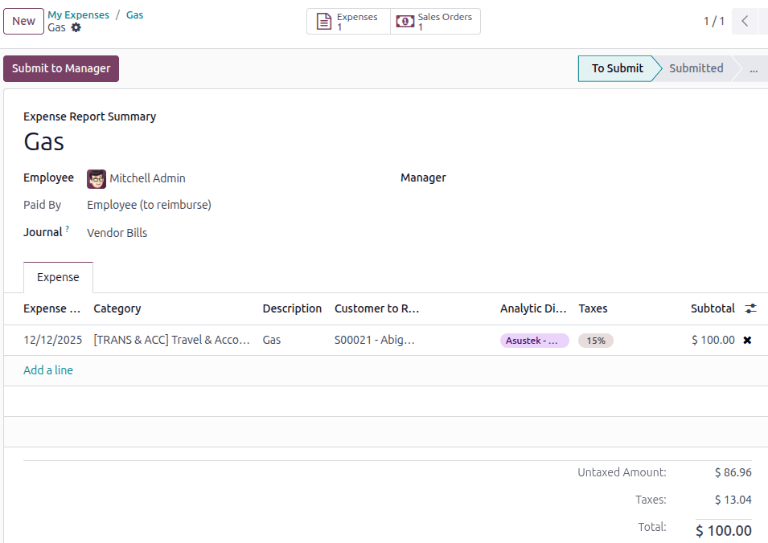
After the expenses are created, click Create report. Once the expense report is submitted, the Sales Orders and Expenses smart buttons appear at the top of the expense report. The smart buttons will display the number of SOs and expenses linked to the expense report.
Next, click Submit to Manager to request approval from the assigned Manager.
Viktigt
Fältet Kund till återfaktura kan ändras endast tills en utläggsrapport är godkänd. Efter att en utgiftsrapport har godkänts kan fältet Customer to Reinvoice inte längre ändras.
Attestera och bokföra utlägg
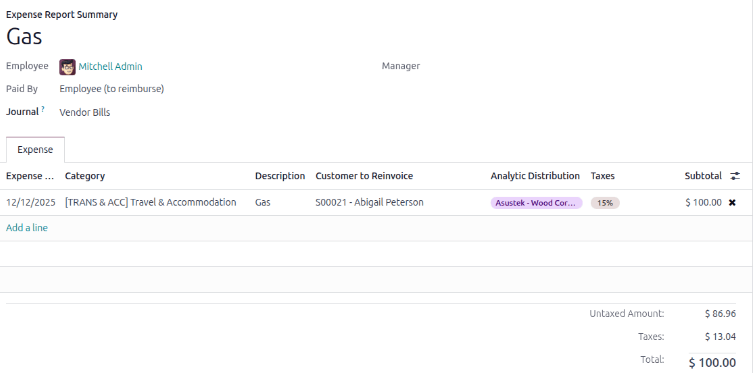
Before approving an expense report, ensure all the information for every expense line is correct, then click Approve.
Observera
Knappen Approve visas endast efter att en utläggsrapport har submitt.
The accounting department is typically responsible for posting journal entries. To post expenses to an accounting journal, click Post Journal Entries. Once an expense report is approved, it can then be posted.
SO uppdateras endast efter att verifikaten har bokförts. När verifikaten har bokförts visas utgifterna nu på den refererade :abbr:`SO (försäljningsorder).
Invoice expenses to the customer
Once the expense report is approved and the corresponding journal entries are posted, the SO is automatically updated, allowing the customer to be invoiced. The accounting department is typically responsible for generating the final invoice.
Select the desired expense report, and click the Sales Orders smart button to open the SO. The expenses to be re-invoiced now appear on the SO.
Observera
More than one SO can be referenced on an expense report. If more than one SO is referenced, clicking the Sales Orders smart button opens a list displaying all the SOs associated with that expense report. Click on a SO to open the individual SO details.
Example
A electronics repair company has a large customer base. Their service charges vary depending on the product they service. A technician uses different components depending on the product they service and services five customers per day on average.
After each job the technician submits an expense and associates the appropriate SO for each. At the end of the day, the technician selects all of the expenses and creates an expense report for the manager to review and approve.
When the expense report gets created, several SOs are linked to it. The Expenses and Sales Orders smart buttons display the number of linked records on the top of the expense report.
On the SO form, the expenses are now line items in the Order Lines tab, with their Delivered column filled in, and ready to be invoiced.
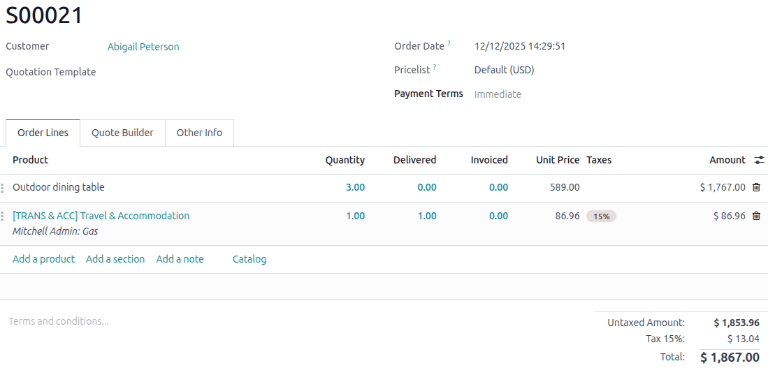
Click Create Invoice, and a Create invoices pop-up window appears.
Select if the invoice is a Regular invoice, a Down payment (percentage), or a Down payment (fixed amount), and click Create Draft Invoice. A customer invoice draft window displays the products and expenses in the Invoice Lines tab.
Observera
For an SO with a product and a expense, if the product has not been delivered to the customer, only the expense is listed in the Invoice Lines tab of the invoice. Creating two invoices for one SO is possible.
Click Confirm to change the invoice status from Draft to Posted.
To email the invoice to the customer, click Send. A Print & Send pop-up window with a pre-configured email message and a PDF invoice in its body is displayed. The message can be reviewed and modified, if needed.
Click Send to email the invoice to the customer. The pop-up window disappears, and a PDF of the invoice is automatically downloaded for record-keeping and printing purposes.
Invoice payment
Depending on the payment configuration in the Accounting app, there are several ways to process payment for an invoice. This workflow incorporates the customer portal and manual verification. The customer is responsible for submitting the invoice payment and the accounting department is responsible for verification.
Observera
For online payments through the customer portal, the Invoice Online Payment feature must be enabled on the Accounting app. Also a payment method must be set up.
Navigate to the invoice by clicking and select the desired expense report.
Click the Sales Orders smart button, then select the desired SO. Click the Invoices smart button.
After clicking Send, the invoice is emailed to the customer and published online on the customer portal. Click Preview to see the customer’s view of the invoice and payment methods.
Once the customer pays online, the invoice gets an In Payment banner. The Payments and Payment Transaction smart buttons display at the top of the invoice form.
Click the Payments smart button to go to the Pay form. Click Validate to confirm that the invoice payment has been received. The Pay form is automatically updated to Paid.